We were tasked in irrigation class to create a troubleshooting guide to use in the field. My group created a guide for Rainbird and Toro valve-in-head sprinklers. We had on each of these guides, a "won't turn off" and "won't turn on" section. These particular guides are not for electrical troubleshooting, but rather, for the hydraulic side of the sprinklers. Feel free to download these and use them at your course if you wish. If you do download them and use them, please give me a tweet (@rogers_braeden) and let me know. Thanks!
Rainbird Troubleshooting Guide
Toro Troubleshooting Guide
Friday, March 28, 2014
Monday, March 24, 2014
Electrical Lab
Today in Irrigation class we worked on creating an electrical troubleshooting guide for various electrical issues. We used Rainbird and Toro satellites for our various electrical problems that we had to diagnose. We had problems such as: wire continuity, bad solenoid, voltage issue, etc.
 |
| Diagnosing problems |
 |
| We used Rainbird (left) and Toro (right) satellite controllers |
 |
| Checking the resistance (Ohms) on the solenoid |

Sunday, March 16, 2014
Irrigation on Auto CAD
For our final project in irrigation class, we are tasked to design an irrigation system for a golf course that we designed last semester in Golf Course Design class. We will use the fundamentals learned during the lectures in irrigation and use our Auto CAD skills to add the system to our golf course. We will create the most water efficient sprinkler set up and also take into consideration the elevation changes for our pipes. We will do calculations to figure out the friction loss and pressure loss over the length of the pipe as well.

Thursday, March 13, 2014
Golf Course Architect Presentation
.JPG)
Some tips that he gave us are as follows:
- The most important thing in golf course architecture is drainage
- Don't let the architect push you to do something that you can't maintain afterwards
- When playing the course, you want the golfer to use all clubs in his/her bag, so keep in mind the length
- Longer is not always better
- You need to fit into the scale of the site you are on
- If you have a golf course with big mountains surrounding it, then make the features (bunkers, water hazards etc.) bigger as well, and vice versa
- If you are renovating, resist the urge to change the style
- Tell the architect you are working with:
- The weather
- Things that do and don't work well on the course
- Hire the right individuals to do the job or it may cost you in the long run
- Renovation should be a collaborative process
- Get the most out of your architect
Tuesday, March 4, 2014
Hand Mowing Guide and Video
Last semester we were tasked to make a guide and video on how to safely operate a walk behind greens mower. Below I have attached a link to the document that one of my fellow classmates in my group created. Credits for the document go to Ethan B. Also, the video is below for you to view and even use on your course if you choose to do so.
Mowing Guide PDF: Walk Behind Greens Mower Instructional Guide
Mowing Guide PDF: Walk Behind Greens Mower Instructional Guide
Monday, February 24, 2014
Diagnosing Sprinkler Problems
Today in irrigation class, we had various sprinklers that we needed to diagnose the problems to. They would either be stuck on or off and it was our job to determine the reasons why. It was as simple as the sprinkler was in the "off" position, and as difficult as a minuscule hole in the upper chamber of the valve. We used both Toro and Rain Bird sprinklers.
 |
| Assembling the sprinklers onto the stands |
 |
| A small hole in the upper chamber of the valve |
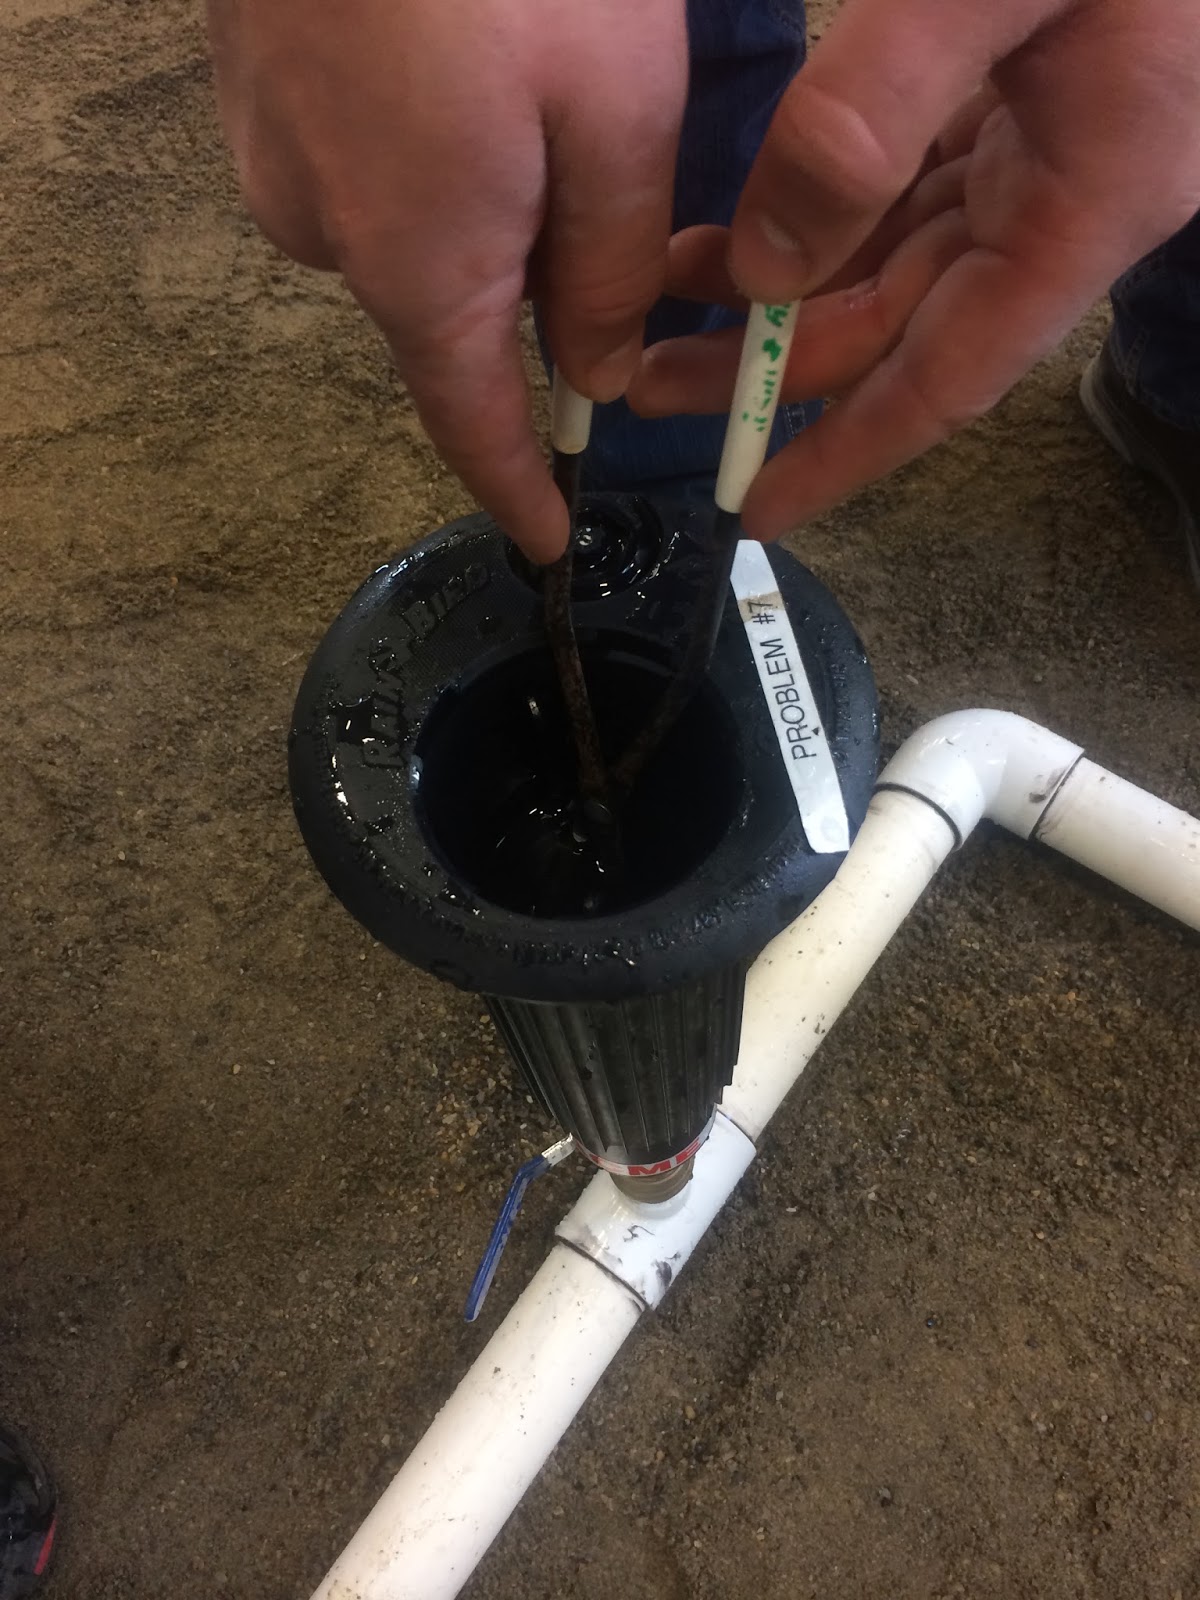 |
| Did not shut off in Auto mode |
 |
| Valve problem was no plunger |
Monday, January 27, 2014
Building PVC Sprinkler Stands
Today we built sprinkler stands for Irrigation Labs. These consisted of creating a dimension with 2 inch PVC 160 pipe. The dimensions that we used were 5ft x 2.5ft. The rectangular sprinkler stands had 4 sprinkler attachment locations. To make these, we cut the PVC pipe to length as well as factoring in the size of the joints. We had 4 elbows and 6 T's. There were 4 T's for sprinklers and then one for drainage and one for the in-feed. We cut everything to size, then we solvent welded all the pieces together with primer and glue.

Subscribe to:
Posts (Atom)