Showing posts with label nursery. Show all posts

Tuesday, February 5, 2019

Grinding Reels

Yesterday was spent grinding reels to get them ready for the season. The machines that we have at The Nursery are a Foley 388 relief grinder and a Bernhard Express Dual 3000 spin grinder. We do not have a bed knife grinder, so in the winter, we put new knives on the reels. They usually last the whole season, aside from the greens reels, which normally get one regrind, and a new bed knife mid season.

Mid season I keep reels cutting paper without contact by using a Bernhard Rapid Facer 1000, and then backlapping. The rapid facer puts a nice edge on the front face of the bed knife, which does the cutting. Backlapping after then matches the reel to the bed knife. I use 120 grit for greens reels, and 80 grit for tee and fairway reels.

Bernhard Rapid Facer 1000

There is a lot of talk regarding backlapping and how grinding is better. I totally agree with that statement. But we do backlap reels a lot. Why? There is no mechanic, and a small crew here, so I am part of the crew to get things done. For our clientele and the standards at this course, backlapping and the rapid facer work wonders. If done properly, backlapping should not cone your reels.

In the winter months when I have time, I will measure all the reels' diameter with a Pi Tape. I put all the reels on the Foley 388 grinder and remove any cone that may be present. If there is no coning present, I still put a relief angle on all the reels regardless. I believe in using relief and not just spin grinding. I have noticed a huge difference in cut by using the relief, and backlapping also works a lot better with the relief angle. 

Foley 388 relief grinder

Once the reels are done on the Foley, I then put it on the Bernhard Express Dual 3000. This grinder puts on a flat grind to the reels and it also confirms that all the blades are the same length, ensuring a great cut. It is very easy to use once you get the hang of it. 

Bernhard Express Dual 3000
Once the reels are finished on both grinders, here is the finished product. A flat grind with a  relief grind. It is the best combo in my opinion. It is how the OEM ships their new barrels out. 


Monday, February 4, 2019

Plugs Update

On Monday, January 28th, I went out to greens 1, 4, 7, and 8 to take some plugs using the hole saw. The reason I took these plugs was because of ice that formed on them in November due to rain on top of snow. Most of the ice was cleared off in November from those 4 greens, but I wanted to start planning for the spring (seed if needed etc.) It has now been 7 days since I took the plugs. They are looking good! One and a half more months of snow cover.


Monday, January 28, 2019

Checking Greens with Ice

Today I went around to our 4 worst greens (1, 4, 7, 8) that had ice on them in November. We cleared what we could in November, but I wanted to see how they are doing currently.

The snow is pretty deep across the course, with high spots barring off a bit. For the most part, the snow depth is about 8-12 inches. Due to the snow depths, I had to take the tractor to get around the course.

Using the tractor to get around
Upon arriving at 1 green, the whole green was covered with snow which was a good thing to see. I walked out onto the green and cleared away a spot so that I could take a plug out of the green. It was all "fluffy" snow right down to the turf. Always a plus at this time of year.
"Fluffy" Snow down to the turf layer

I used a hole saw attached to the cordless drill, and this worked well. Once the hole was cut, I then used a screw driver and a hammer to pry out the plug, as the ground is frozen solid.

8 green removing a core

Once the core was removed from all 4 greens, I then brought them inside the shop and put them on paper plates by the window. The reason for the paper plates is so that any ice on the plugs will melt and not leak all over the wall. I used some pin flags cut down to write what green each plug was taken from so that I could see the process in the next week or so. 

Thursday, November 22, 2018

Ice on Greens

Over the weekend, it snowed roughly 8 inches, and then rained 9mm on top of it. The rain mixed with the snow to create an ice layer on some greens. The reason that ice is bad on grass, is that it limits the "breathing" of the plant, causing a Carbon Dioxide buildup.

The greens have 2 types of turf species in them. Creeping Bentgrass and Annual Bluegrass. Bentgrass can last 60 - 90 (sometimes 120) days before it starts to die from the buildup of gas. Annual bluegrass can only last about 30 days. Since the bentgrass is more tolerable than the annual bluegrass, if the annual bluegrass dies, it would be beneficial to help promote more bentgrass. 

The two types of ice that can form are porous (or popcorn) ice, and solid ice. The porous ice has some air bubbles in it which usually allows the turf to last longer underneath as it can breathe.

Porous Ice (Popcorn Ice)
Clear Ice

I examined all the greens and decided to clear the greens with the most snow on them, since it would take longer for the ice to melt with the snow on it. The first step was to snowblow the affected greens on the course. As the snow was removed, we checked to see if there was ice. On every green we cleared there was ice, so I am glad we did that.


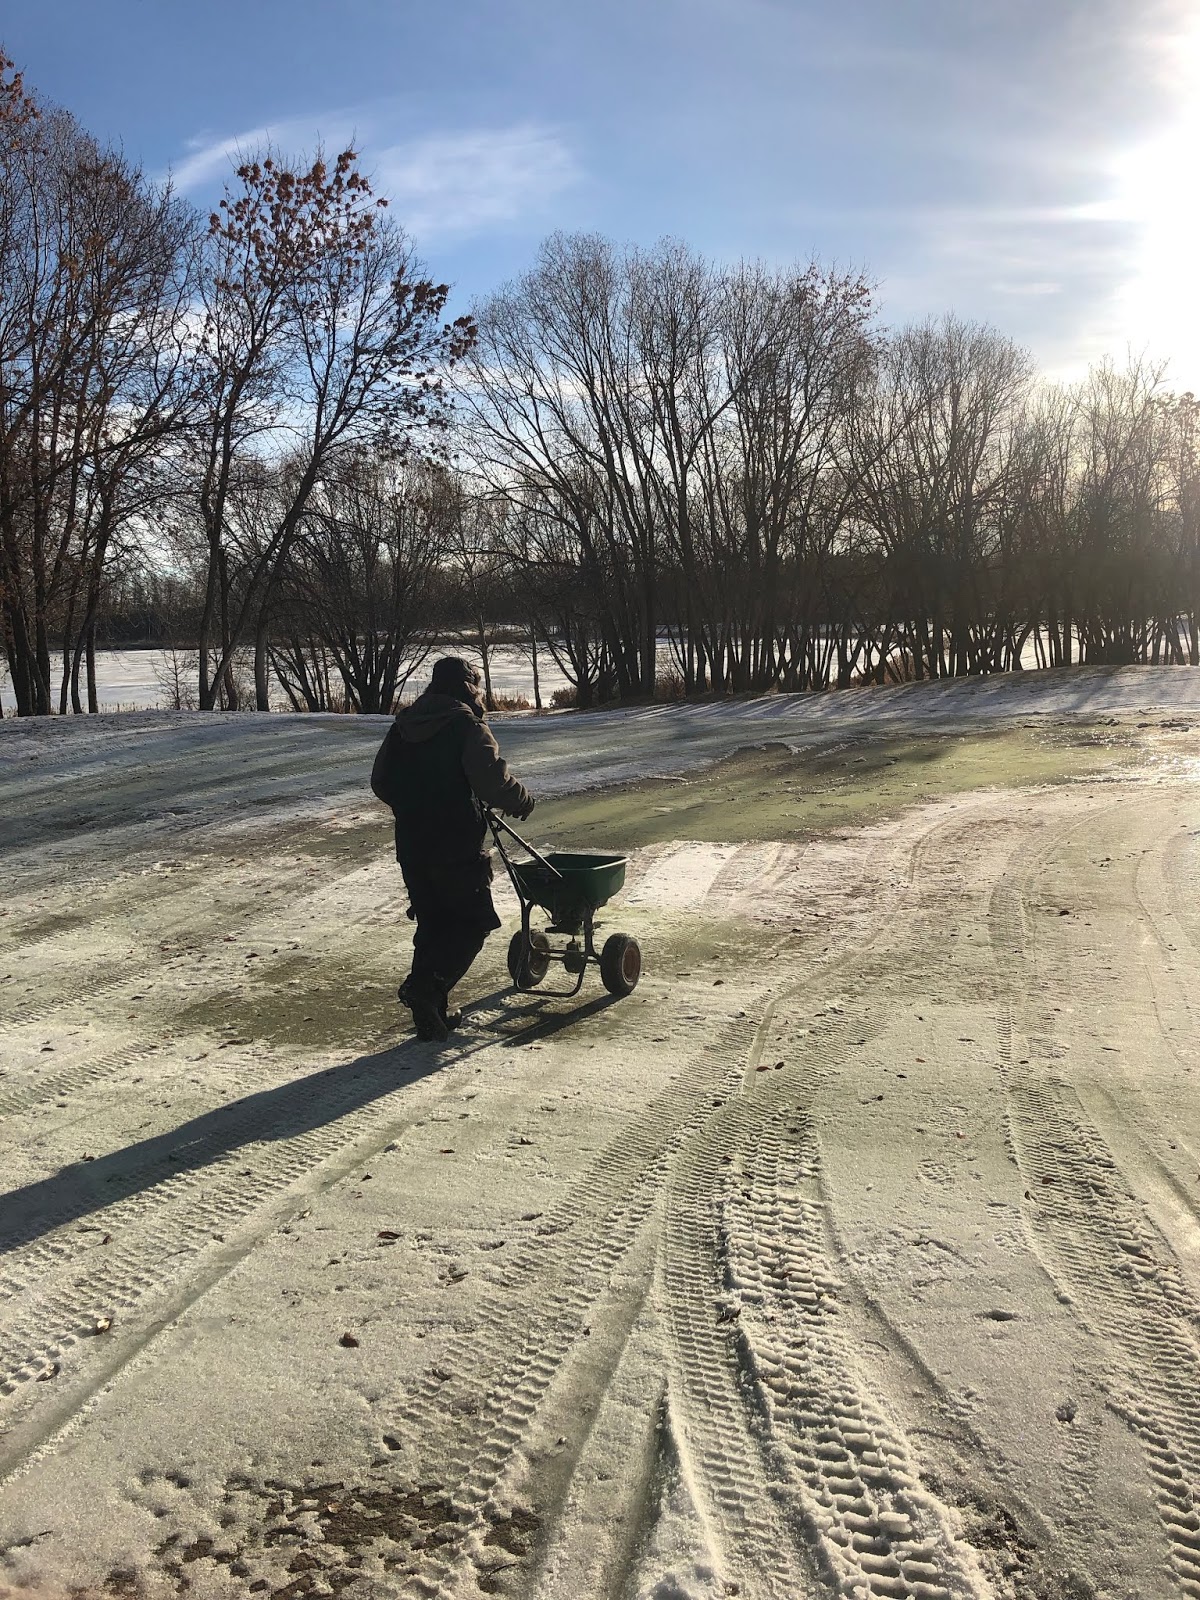
After the greens were cleared of snow, we then started applying dark green sand to help aid in the melting of ice. The dark colour of the sand pulls in the heat from the sun, and won't damage the turf, unlike ice melting salts for example. 

Applying dark green sand
Dark green sand on #8 green
We then let the sand sit on the ice and snow to melt the ice and make it easier to break up and remove. Once the sand had sat there for a while with the sun hitting it, we then started the manual labour to break up the ice. We used ice chippers and shovels to remove as much as we could. It was a great workout. We did this for 3 days in a row with everyone that we had available to help out. The owners, the assistant superintendent, and general manager. 

All hands on deck to remove the ice and snow
As the ice melted, there was a considerable amount of water being left on the turf, which could freeze into ice again. We used the squeegees to push as much of it off as we could. 
Pushing water off #4 green
On the last day we brought out the aerator to help, as the manual chipping was taking a long time. The aerator worked okay. It made holes in the ice which is a good thing. It will allow the carbon dioxide to be released and for the turf to start breathing again. Some areas worked better than others, but it was all we had to do the job. The main goal was to just remove as much ice as we could. 


The result on #1 green after the aerator went
over it
A few other things we tried were using the tractor with the box scraper to push as much snow as we could off the green. We won't know if it's beneficial or not until the spring. Another strategy that we came up with was applying a regular greens grade granular app on the green. Fertilizer is a salt, and salt melts ice. As long as you don't go above the recommended rate on the bag, you should be fine. Let's hope for positive results in the spring!

Friday, October 12, 2018

Refinishing Benches

This fall has been a very snowy one in central Alberta. We have lost a lot of days in September and october. For the past week, we have been busy working on refinishing the benches so that they will look better for the upcoming season. This was done in house with my assistant, one full time employee, and myself. 

Before
The benches were sanded down outside, to keep the dust down in the shop. Once they were sanded down, we wiped them down with a damp rag and used the air blower to remove any dust. Once that was completed we then painted the wood, as well as the metal legs. 
After
It's the little things that make a difference out there.


Wednesday, October 3, 2018

Blowout 2018

It never seems to fail that we receive snow around irrigation blowout time. The snow would be fine if we had an electronic irrigation system, but because it is all manual (turning on heads and valves), the snow makes it more difficult to find them. We marked a majority of the heads before the snow came, as the forecast was calling for some.

Snow on the course before blowout
We did not get them all done unfortunately. That's where the buffalo turbine comes in handy. We knew a general area where the heads were, so clearing them was a breeze.


The following day, once it snowed more, we went out in the morning to blow around the heads and valves so that we could start blowout. Blowout takes 2 days if done properly.

Blowing around flagged heads

Thursday, September 20, 2018

Hole 11, Par 6 Tees Renovation

The longest hole in Canada, the par 6, 11th hole had its par 6 tees reconstructed this fall. During the summer we installed our new RV park, and a majority of the dirt that was excavated out of the former driving range, was brought to 11 tee. This tee was not very nice before. It was small and would get run down quite easily. If hole 11 is our signature hole, let's make it signature and be of good quality.

Once all the dirt that could be dumped there was, we then had the owner come in with his large farm John Deere tractor. He rototilled it all so that it was smooth and shaped them into tee boxes. HIs tractor is much larger than ours, and the power from the pro was able to break up all the big sod chunks.
Rototilled soil
We don't have any fancy laser levelling box scarper or anything like that. We make do with the equipment and resources we have on hand, unless absolutely necessary to rent something.

Once the soil was rototilled, it was then packed down using the tractor by driving on it, and pulling a set of harrows behind it to remove any clumps. This worked pretty well. Again, not as great as some of the fancier equipment that can be used, but it worked for us. The next step was installing irrigation lines and heads.

We began by using our 3 point hitch, hydraulic excavator to dig the trench for the lines. We soon found out that this was taking way too long. It is not the fastest piece of equipment. It took about 4 hours to dig less than 80 ft.

3pt hitch excavator
This was one of those times when it was worth it to rent a piece of equipment to improve efficiency. We rented a ride on ditch witch trencher. This machine cost roughly $150 for half the day.

Ditch Witch trencher
With it being a ride on, we finished this 500ft irrigation line in about half an hour. We rented it for half a day, so we trenched a few more things that needed to be done on the course. This was a win for sure. We weren't wasting labour hours to sit on the excavator for couple days. This was well worth the money, and completing other projects with it was great.

Once the lines were trenched, it was time to lay the pipe. We did not do a loop system in this particular area, as it would not work. It was a straight line with 5 heads on it. All 5 heads would not run at once, as we are a manual irrigation control. Once everything was installed, we backfilled the trench and seeded it. This was a fall seeding, so we are waiting to see in the spring how it turns out.

Wednesday, August 29, 2018

Sand Holding Area

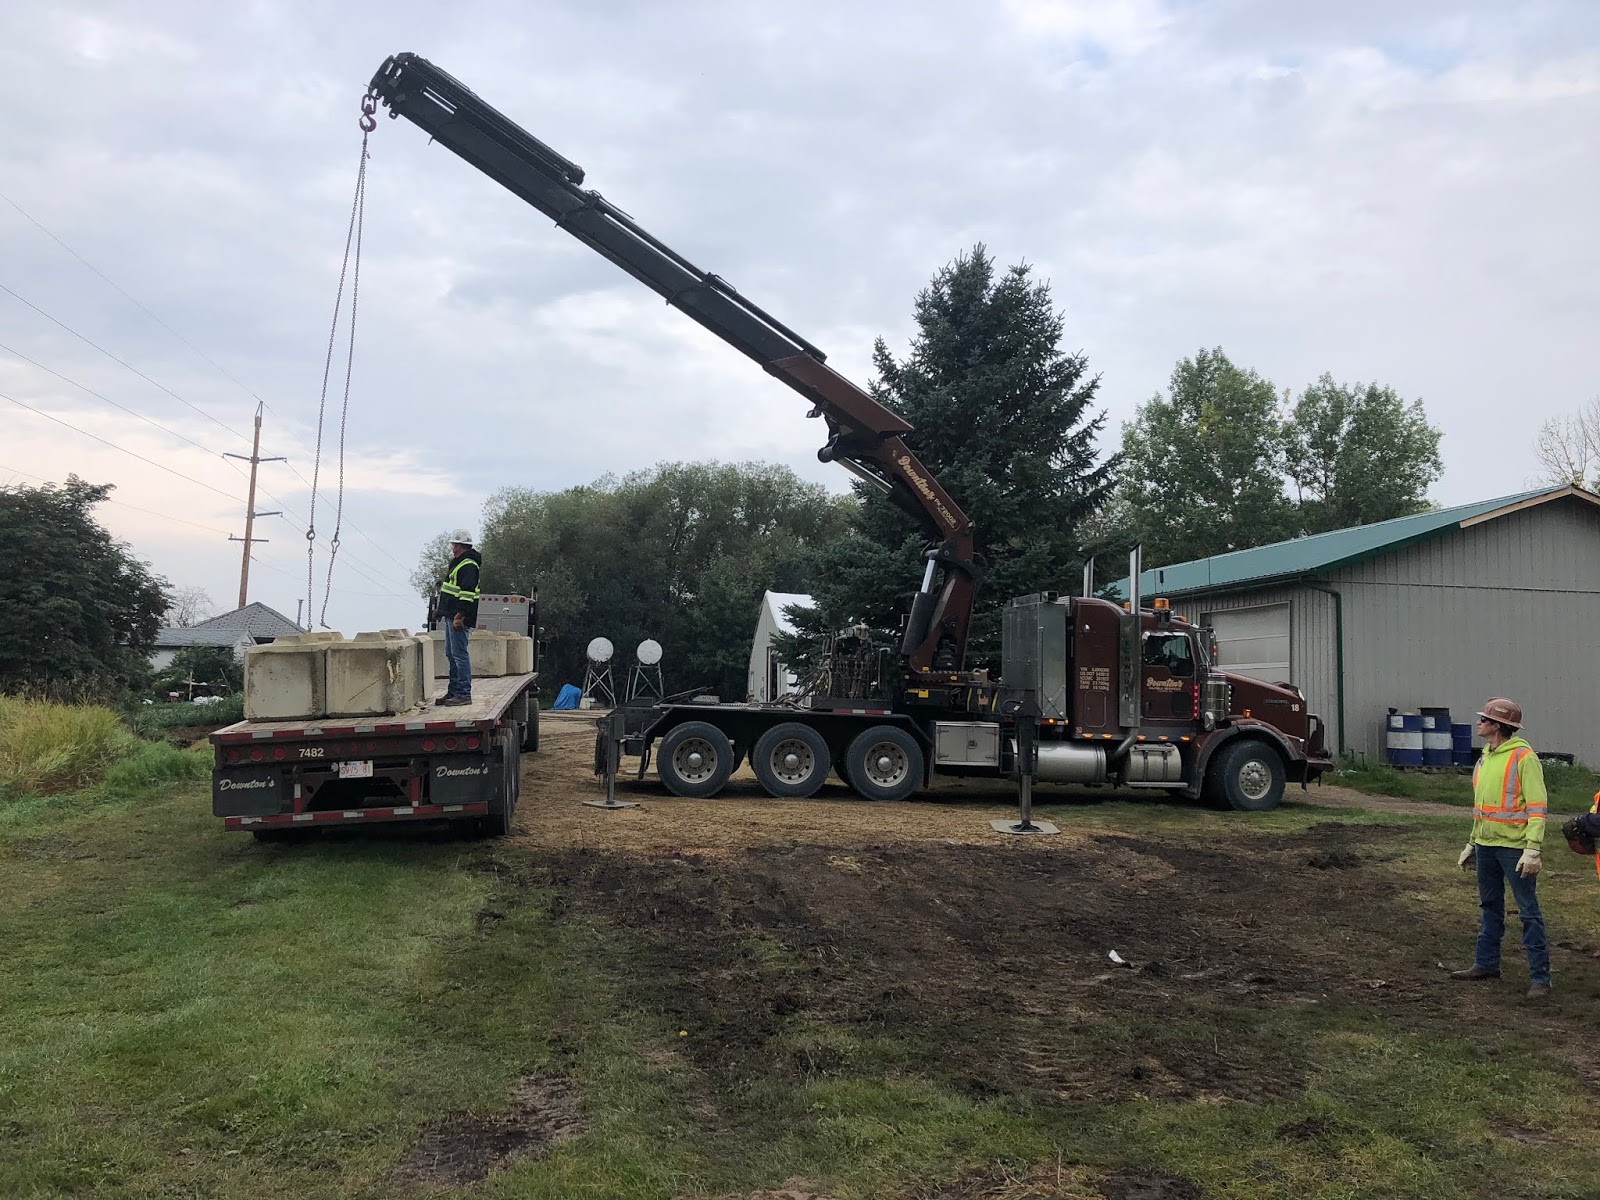
Today we received 31 cement "lego" blocks from a cement company in town that was moving to a new location, so we got a good deal on them. Currently the sand goes in a staff parking area, and it is not ideal as it takes up space. With these blocks, they will be created into a rectangle sand holding area. We did not put down concrete under it, although it would be nice. The costs are too much at the current time. The ground that it there currently will work just fine.

Once the 2 flatbed trucks arrived with the blocks, they were put into place using a crane.

Crane picking up 2 blocks at once
It took about an hour and a half to have everything placed properly, but once it was finished it looked really good.

Finished product
This is nice to have, as we now have somewhere to put our sand.

Friday, July 7, 2017

Work has to be fun right?

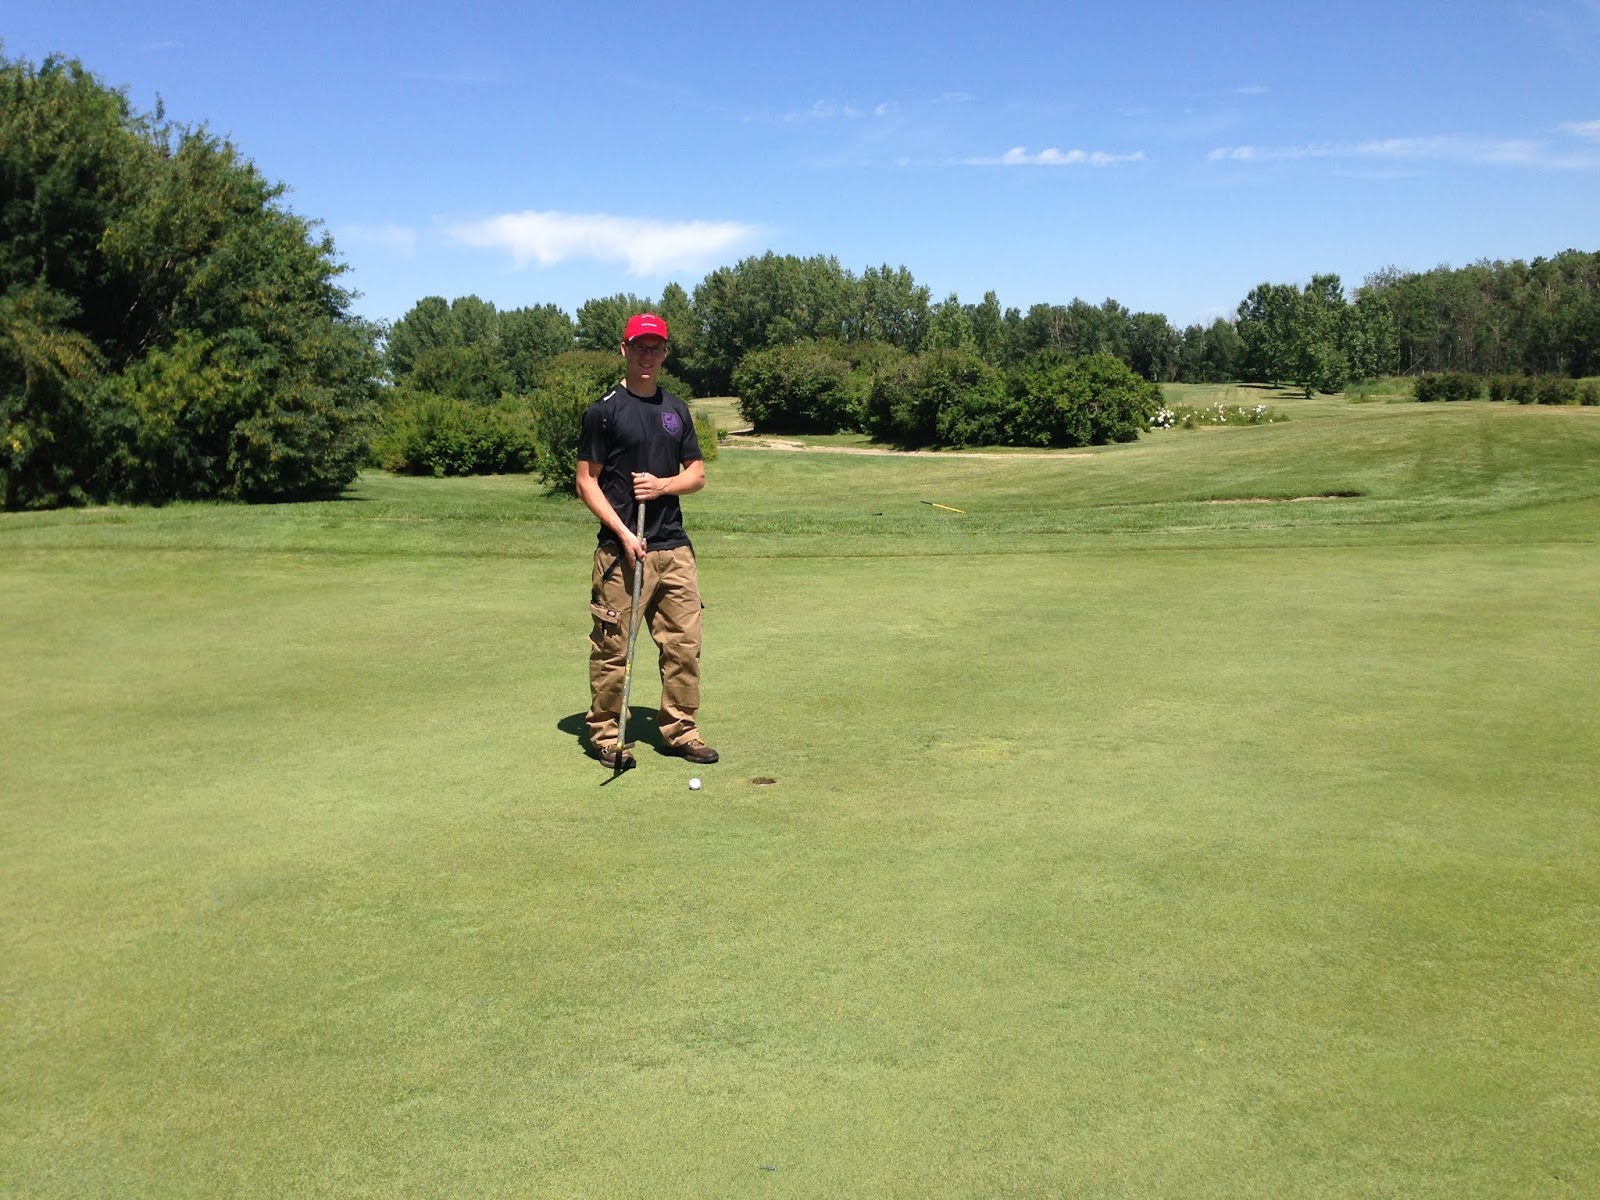
A little fun today. While one of my employees was irrigating using the valve key, I stopped in to check on how he was doing. His response "I am waiting to turn off 8 so I can turn on 6". (Yes we have manual irrigation). He was practicing his putting with the valve key while no golfers were around. Can't always be serious at work. You must have some fun. Thanks for your hard work Elijah!


Wednesday, July 5, 2017

Black Turfgrass Atenius

I noticed some weird dry spots on #13 green, but upon using the moisture meter to check, these were not dry spots. I kept my eye on it for a couple days and I noticed that birds were pecking the turf, eating something within. I went over to take a look and noticed little black beetles all over the green. Upon inspection, these looked to be Black Turfgrass Atenius beetles.This green is particularly thatchy, so that is part of the problem. They like to burrow into the thatch.

I went out the next day and sprayed an insecticide to kill the beetles. The next week, it all looked fine again. After that, we focused more on heavier thatch removal through verticutting, and that has seemed to help the issue.

Update: 2018 season we had no issues with the beetle, as we were controlling thatch more.

Weird looking "dry spots"

Thursday, April 20, 2017

Spring is in the Air

The greens have come through winter in great shape! Such a relief as that was my first winter fungicide application while being a Superintendent. I have to say that Trilogy worked great for us on all greens. There is a distinct line where the sprayer was turned off. 
18 green first cut of the year

Friday, March 31, 2017

Flooding

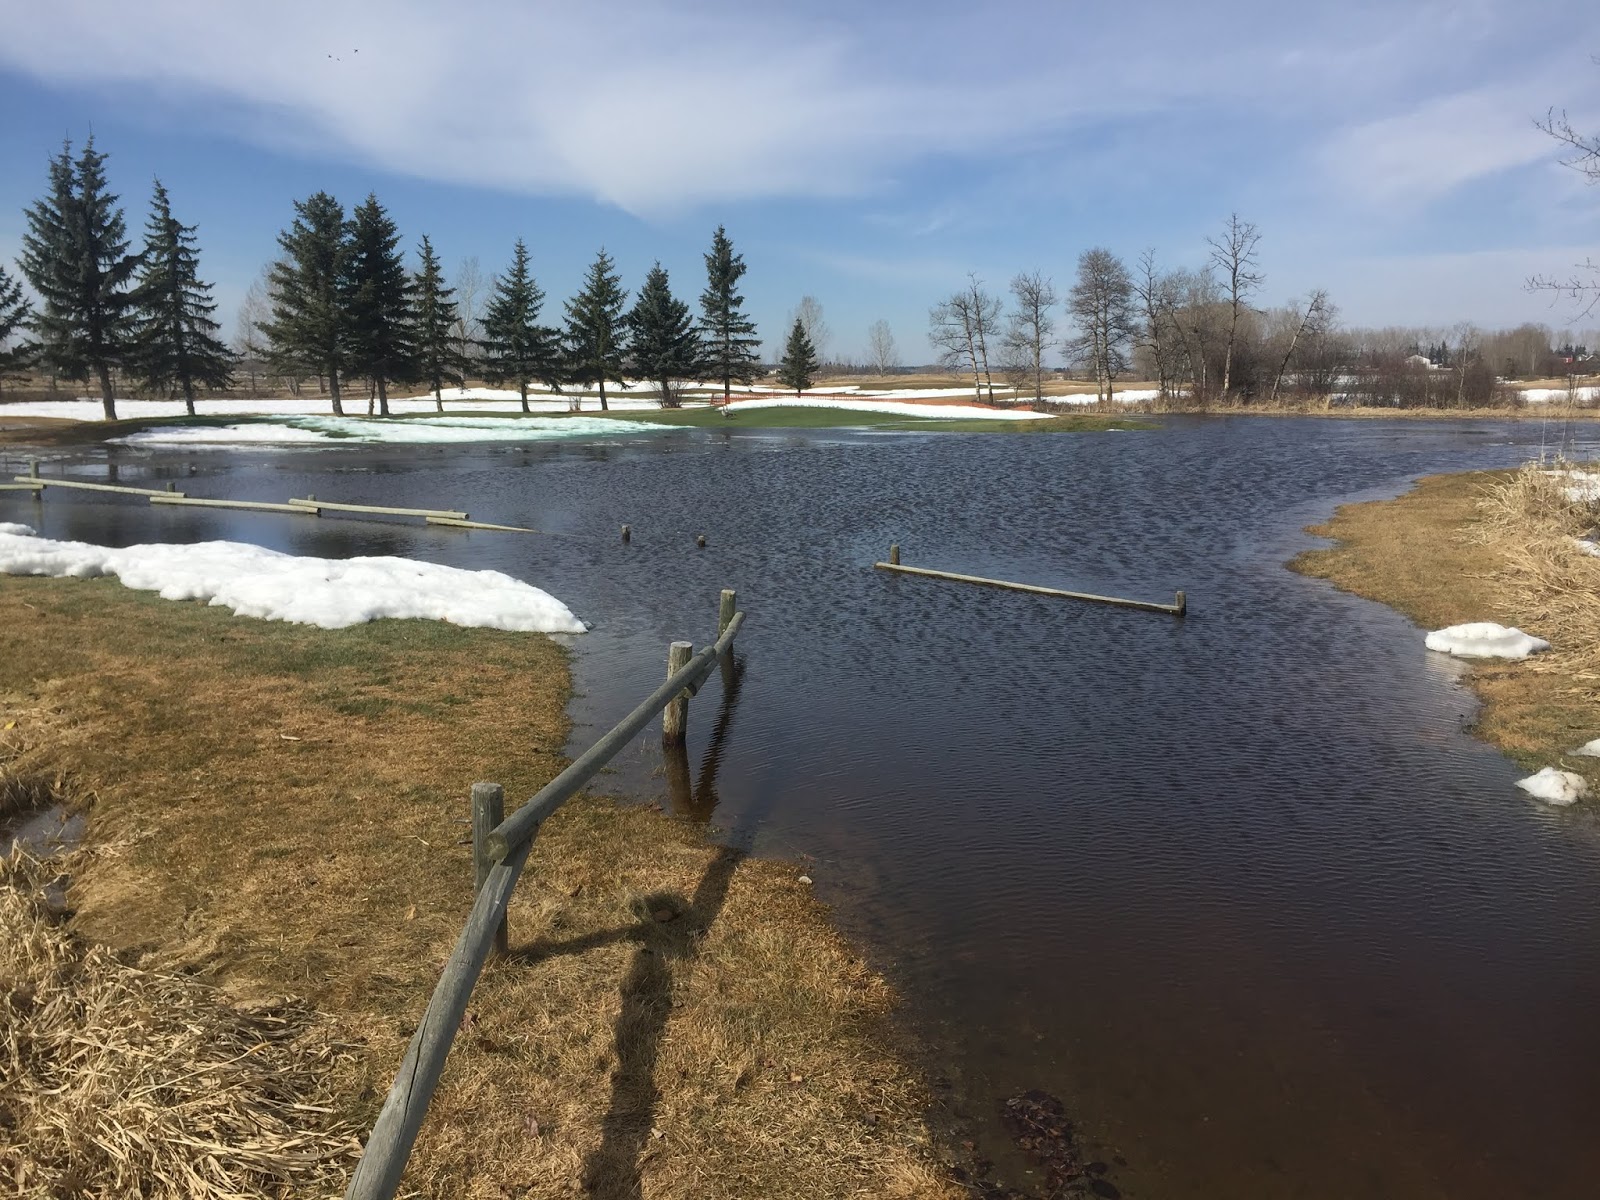
Each spring the course floods on the lowers areas. Welp brook runs through the course and during the spring melt, all the water from the properties up stream comes through the golf course. It fills our irrigation reservoir, but overfills it. Normally holes 10, 11, 12, 14, 15, and 18 flood.

18 Fairway
11 Fairway

We have an arsenal of pumps that are used to get the water off the course ranging from 2" trash pumps to 6" floating pumps. These constantly run to put the water back into the brook, once it goes down.

6" floating pump
10 green just poking out of the water 

Wednesday, June 1, 2016

Equipment to Speed Up Recovery


With the greens not being great this season due to the desiccation and snow mold damage, we were happy to try any other equipment to help speed up the process of recovery.

Slit Seeder

We demoed the Turfco Triwave slit seeder on our worst green, #14. This machine worked very well. It creates a slit in the ground and then drops the seed into it. Following the seed being dropped, there are rollers on the back which push the soil back together afterwards. The slits could've been closed a little more by using a greens roller afterwards, but we left them and it worked. 

Turfco Triwave in Action

Slit seeder rows growing in
Sweep N Fill Brush

Another piece of equipment we demoed (and eventually bought) was the Sweep N Fill brush. This brush rotates while you pull it, flicking the turf. 

Tuesday, May 24, 2016

Equipment Maintenance

The past few weeks have been busy with the greens recovery. But while that is all going on, I have to remember to do any equipment maintenance that is needed, since we don't have a mechanic. 

Backlapping Reels

At The Nursery we don't have a spin grinder or a bed knife grinder, just an old foley 388 relief grinder. This means we sharpen our reels in the winter, then backlap throughout the season to keep the reels in good shape. It would be nice to have a spin and bed knife grinder, but our budget does not allow that. On top of that, you need a person to grind the reels in the summer, as I would not have much time with our small crew. Backlapping works well in our situation. 

  1. Set up the bed knife to reel contact to a light contact. 
  2. Adjust the reels into the backlapping mode (usually under the seat)
  3. Turn the speed knob to the slowest setting. (usually under the seat)
  4. Engage reels and apply backlapping material with a paintbrush
  5. Backlap the reels for roughly 10 minutes
  6. Wash off the grit and check the quality of cut
  7. Set the height of cut.
Backlapping Fairway Mower


Applying Backlap grit to the reels

Changing Bearings in Rollers 

Rollers are always turning at a rapid pace and they hold a lot of weight, whether it be on a greens mower to a sidewinder. All rollers are the same. Rollers have end caps, bearings, and seals. I like to keep bearings and seals on hand in the summer so that the down time of the machine is limited, if a bearing is to fail.


Remove end caps on rollers

Remove the bearing and seal

Remove the shaft
Air Filters

Air filters should always be checked often. They filter the air before it enters the engine. You want to keep these clean so the engine does not starve for air. If the air filter looks pretty black and dirty, you can blow it out with some air, but sometimes that does not do the trick. I always keep air filters on hand for every machine. They work in dirty environments full of dirt, dust, and grass clippings.

Air filter on the fairway mower after
a week of poplar fuzz
New Engine

As mentioned in a previous post, we like to keep machines as long as possible, due to the prohibitive cost of new ones. This past week we had a Toro 3150 triplex bog down often while operating. I looked at the air filter and it was full of oil. I tried to keep the oil level at half and see if that helped, but it didn't. Sadly it was time for a new engine on this unit. A lot of courses would buy a new triplex before a new engine, but for us, this option was the way to go. 

Installing the new engine was a great learning opportunity. It was all done in house with the GM and myself. We took 2 days to remove the old engine and to install the new one. We had to remove the hydraulic tank to loosen what was necessary under it.

Hydraulic Tank Removed

Preparing to Remove the Old Engine

More wear and tear...or is it?

We had an issue with a Toro Sidewinder spewing hydraulic fluid out of the muffler. This was confusing to me at first, but upon inspection, it showed that the hydraulic line was rubbing against the muffler. This created a hole in the muffler and then was shooting out the hydraulic fluid when it was running.

Hydraulic line rubbing against the muffler
I called the local toro dealer and they came and took a look. This model is the 3500-D. The "D" stands for diesel. According to the Toro mechanic, the muffler that was on this machine was actually for the gas model of sidewinder. The gas model has a different routing of hydraulic lines. The local Toro dealer came in the next couple days with the proper parts and carried out the repair, as it was still under warranty.

Saturday, April 9, 2016

Opening Day!

April 9th. Opening Day. 11 green.

Brady Ambler (Asst Super) setting the first pin of the year on 11 green

Today is the opening day at The Nursery. As the snow has melted, more and more greens looked desiccated, and damaged by snow mold. Not a great start to my first year as Superintendent, but on a positive note, it's good to get my most difficult year in the first year.

I have received information from the consultant who was in charge of the grounds the year before I arrived. In an email the consultant sent, the greens were put to bed with a moisture percentage of 10-12%. While the greens are push up greens, they should be in the range of 16-20% daily. So unfortunately they went into the winter with insufficient moisture. This lead to desiccation on a lot of greens, in conjunction with the snow mold.


Saturday, March 19, 2016

Snow is Melting! Not looking good...

The snow is starting to melt, and today I went out to look at the greens again, and to say the least, it's not looking good. I have no information on how the greens went to bed from the previous consultant as of yet, but this doesn't look good. Looks like snow mold has made its way on the green during the winter and there was a lot of areas with it. 

Snow Mold on 1 green
While I was looking at greens, some had some standing water, so I grabbed the squeegees to push as much as I could off. See video below.


The green on 5 is the only green that is tarped, and I asked the GM why they did that. The answer is that 5 green is out in the wind, and quite exposed, so they tarped it to help keep it from becoming desiccated. 

5 Green showing the effects of the Evergreen tarp


Saturday, February 27, 2016

In With The New, Out With The Old

Today I spent the day putting in new barrels for our 2 sets of Toro 3150 reels. The old reels were past their wear limit, so it was time for new ones. New barrels are cheaper than getting a new machine, and in our case, we like to run the machines as long as they can go.
New 11 blade 3150 reel
It took me a while to figure out how these new barrels went in, but upon reading the parts diagram and seeing how the old ones came out, I figured it out.
Old, worn out 3150 reels

Friday, January 22, 2016

Winter Machine Maintenance

It's still my first month as Superintendent, and my focus is on learning how to grind the reels and getting them all done. After bringing in the Jacobsen Eclipse 322 triplex, I took the reel motors off to get the reels off the machine. When I removed the motors, I noticed there was a chipped drive motor, on not only 1 motor, but all 3!

Chipped drive shaft on left, key on right

This is not what I wanted. This is the first time I have ever had a machine have something broken and I have to deal with it. There is no mechanic at The Nursery, so I am not only a Superintendent, but a mechanic as well. Coming into this, I am not mechanically inclined at all. This is going to be a great learning opportunity. I am lucky to have an owner who is very mechanically inclined. 

After seeing this part that was broken, I contacted the Jacobsen dealer to see what they could do as the machine only has 804 hours. They were able to send new motors as part of the warranty. Thank goodness, because each motor costs around $800. 

Thursday, January 21, 2016

First Month as Superintendent

Well...I never thought this would happen. At the age of 21, I have my first Superintendent job.

I took a job as Superintendent of The Nursery Golf and Country Club over the summer, to begin in January. It's all who you know. My Superintendent at Shadow Mountain, Brad Pasula, used to work at The Nursery, and the owners asked if he knew of anyone that would be interested. When Brad came and asked me if I wanted to be a Superintendent, I was shocked. I replied, "I think you're crazy". I then thought about it more and thought I should consider the job. We went to Lacombe for a course tour and to meet the owners of the course. It was a great trip and after looking at everything (not that I knew what I was looking for at the time), and having an interview with the owners, I took the job.

It has been a learning curve already. There are no documents left from the year before, so I am unsure how the course was put to bed, besides the information that the GM has. From what I can see on the greens, they look to be alright with no ice. I have been commuting from Olds College on the weekends to start getting the reels ground.

Sunset view from the shop